Seed Saving Tip

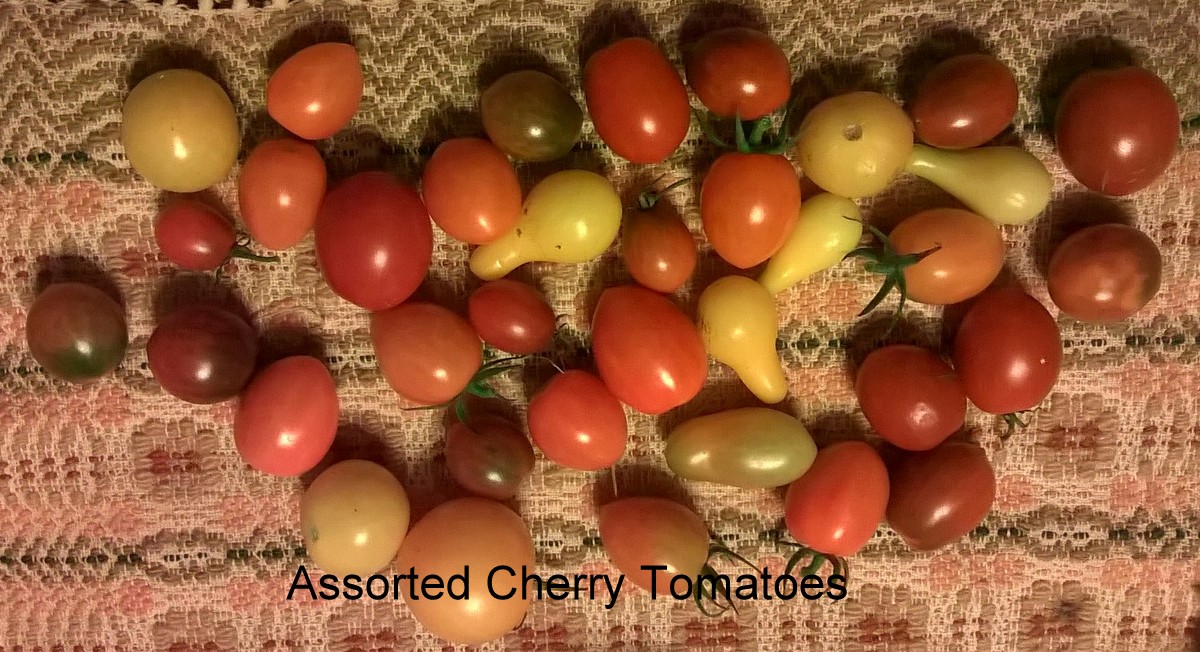
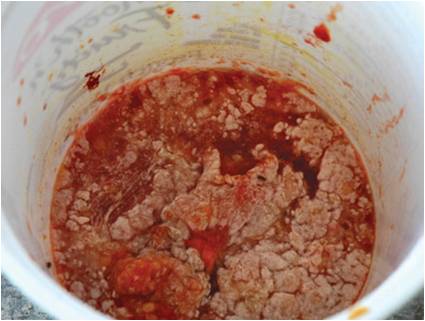
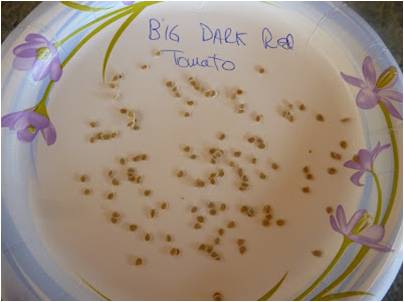
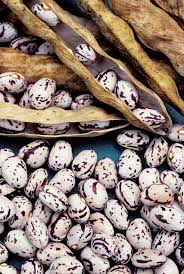
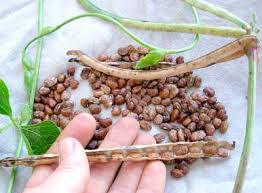
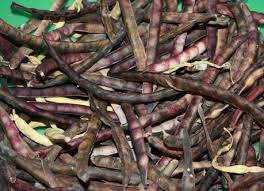
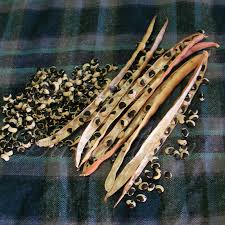
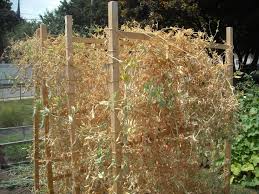
Have you saved seed from your vegetable garden or traded for seed during a seed swap? Have you provided space for them in your spring garden?

Here’s a tip worth your consideration. Find those seeds and start germination testing. Why? Germination of 50% or below should send you to your 2016 seed catalogs for replacements. Doing this now insures you will find the replacements available instead of “out of stock”.

germination1

Save time and money as a low germination rate will require double the seed sown for an expected yield.

An easy technique for germination:

  • Gather paper towels and zip-lock bags
  • Moisten the paper towel
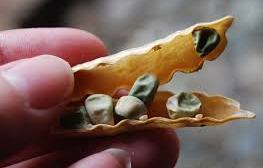
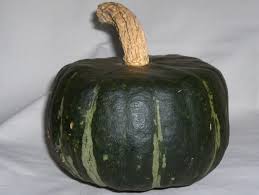
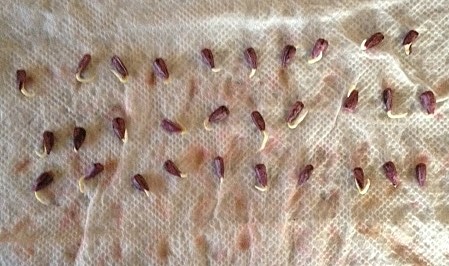
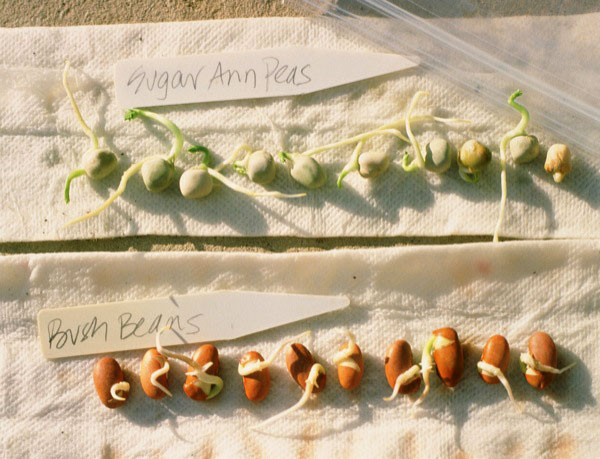
  • For large seeds a minimum of 10 seeds ( ie.: watermelon, gourd, winter squash, summer squash, sunflower, pumpkin, beans, peas)
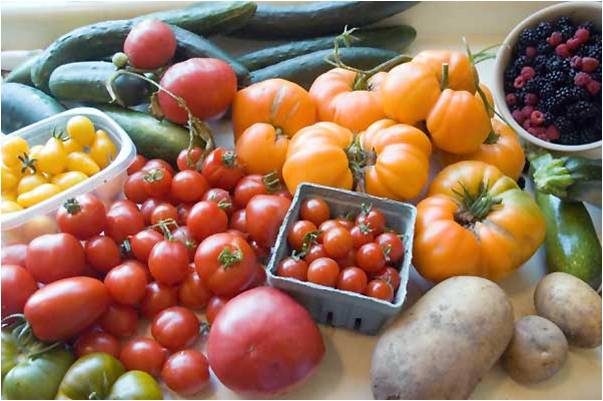
  • For small seeds a minimum of 25 seeds ( ie.: eggplant, sweet pepper, hot pepper, tomato, lettuce, cabbage, broccoli, spinach)
  • Place seed in moistened towel with spacing between seeds and fold towel in half. Be sure to label the bag with the seed name.
  • Place in zip-lock bag and seal.
  • Place the zip-lock bag in a warm place providing temperatures of 70-85 degrees.
  • Check the bag every 3-5 days for signs of germination.The seed coat should be bursting and either a plant shoot should be on the top of the seed and/or a root on the opposite end.
  • All the seeds in the bag should germinate at the same rate of time for the seed type.germination600
  • A 50% germination rate for 10 seeds would be 5 seeds.
  • A 50% germination rate for 25 seeds would be 13 seeds.

Any questions? Do not hesitate to contact me!!

Papa


Sweet Peas for the Sweet!!!

Now is the time to start Sweet Peas for winter and early spring production. Sweet Peas (Lathyrus odoratus) are members of the legume family Fabiaceae which hail from Southern Italy, Sicily and the Aegean Islands.

Henry Eckford of Scotland is responsible for the incredible crosses which produced many of the famous heirloom varieties known today. The noted beauty and fragrance is a direct attribute of the careful breeding by Eckford in the late 1800s through 1906. The breeding production of today focus on stem length and lasting abilities of cut flowers.

Sweet Peas require scarification (nicking or abrading the seed coat to enhance seed germination). Warm water soaking of the seeds may also enhance germination.

Use a nail file or nail clippers to nick the seed coat. The nicking or “chipping” will speed up the germination process. By the way, this is a tedious process. Make sure you give your self plenty of time to keep on schedule for your planting area.

Planting in large cell packs or 4″ pots for transplants is a proper way to plant exactly where you desire. Start the process by using a soiless soil mix with generous compost added. Make sure the soil is adequately moist and plant the seed 1″ deep. I usually plant two seed per cell or pot. Once planted, water in the cell packs/pots and place where the soil temperature is  65° to 68° (F). I know that sounds pretty cold but that is what sweet peas prefer.

The correct germination temperature will insure proper germination in 7 to 10 days. When most of the seeds have germinated move the seed flats to a much cooler area (45° to 55° (F)). A mildly heated greenhouse, coldframe or hoop house will do the trick. Sweet pea seedlings can take it down to 32° (F). The added benefit is stronger and cold tolerant seedlings.

WP_20160106_18_47_46_Pro

Sweet peas may be bothered by aphids when planted outside. The aphids spread disease and stunt the plants and subsequent production. The other area for concern is powdery mildew. Powdery mildew is caused by too much shade and poor air movement. Watch cultural practices (such as full sun and planting further apart to provide air circulation) to prevent the scourge of this pernicious disease.
peapm

Be careful with sweet pea seeds! They are toxic for consumption. If you have small children the seeds could be enticing!

I will keep you posted on future development.

Papa


Warm Weather Winter Gardening!!

It is hard to believe how fast the veggies grow in the warm temperatures this winter!

The lettuce, radish, arugula, beets, spinach and Oriental greens seedlings were started November 30th.

The broccoli, cabbage, cauliflower, collard and kale transplants have tripled in size. The color and texture are simply marvelous!

Sweet Peas will be started this weekend and should be ready to pick by late winter/early spring. The transplants will be started in cell packs to be planted by mid-January.

wall-of-sweet-peas

It has been so warm, the rhubarb and strawberries are starting to take off.

You should definitely try your hand at Fall and Winter gardening.

Papa


Papa is Back! Fall and Winter Growing in the Hoop House!

Howdy folks! I am glad to be back. The hoop house is in production for late fall and winter gardening.

P1030984           P1030991

Cabbage, Collards, Broccoli, Kale, Leeks, Lettuce, Oriental Greens, Radishes and Beets have been started and are on the grow. Higher than average temperatures are making the plants grow faster than I expected. Every season is an adventure.

P1030981

Under the row cover, the environment is like an incubator. Germination is slow but sure. Tasty veggies will soon be on the menu!

Leeks for late winter/early spring harvest. Yum!!

Soon, Sweet peas will be grown on trellises on the northern most bed in the hoop house. Hopefully we will have flowers in late winter/early spring.

Using Christmas lights will supplement the heat needed to speed up production in the hoop house. The lights will be strung from the low tunnel hoops just above the soil and ground cover.

Stay tuned for continued updates.

Papa

The Garden of Treasures!!

My garden is winding down, but look at the treasures! I have always believed you can find beauty and bounty where you least expect it.

For example:

WP_20150930_18_38_31_Pro-001WP_20150930_18_39_06_Pro-001

WP_20150930_18_40_03_Pro-001WP_20150930_18_42_39_Pro

Look here amongst the weeds:

WP_20150930_18_43_19_Pro-001WP_20150930_18_44_15_Pro-001

WP_20150930_18_44_33_Pro-001WP_20150930_18_45_17_Pro-001

So easy to save seeds from Cosmos!! I go along pulling the seed heads. Several hundred seeds in a matter of a minute!!

WP_20150930_18_47_58_Pro-001

My hot pepper “Maule’s Red Hot” is still producing!!

WP_20150930_18_50_32_Pro-001WP_20150930_18_50_49_Pro-001

Last but not least! Treasure from my compost pile!

WP_20150930_19_07_54_Pro-001

Just look at the bounty!

Papa

Seed Saving Garden? Basics for the Beginner! Part 6

Many people are intimidated to harvest tomato seed. Nothing could be easier!! Select fruit from a desired variety that you have maintained by proper isolation distance or caging. Keep the varieties separate and labeled to eliminate the possibility of mixing seed varieties.

Harvest when fruit is fully colored and ripe. Tomatoes may be individually harvested as they ripen. It is not required for seed fruit to be harvested all at one time.

Make sure you harvest fruit that comes from healthy plants and fruit (disease free).

Fermentation of tomato seed is required prior to drying. Fermentation removes the gel coat around each seed. The gel coat may inhibit germination.

Let’s get started!

Cut tomato in half or quarter and crush tomato fruit into a jar or bowl. Add a small amount of water to the pulp.

Tomato seed saving2

Allow pulp to ferment for 2-4 days (2 days if 80°-95° (F), 4 days if below 80° (F)). The fermentation process loosens the jelly around the seed. The jelly contains compounds that inhibit germination.

Tomato seed saving3

Add water to the fermented pulp and agitate. Viable seed will stay on the bottom while the fermented material and bad seed will float to the top. Strain mixture to remove the pulp and fermented material.

Tomato seed saving4

Place the moist seeds on a labeled and dated paper plate and allow to dry for 2 weeks. Paper towels, unbleached coffee filters or framed fine screens will work as well.

Tomato seed saving1

Scrape seed off of the paper plate and place in a labeled paper envelope (place envelope in a freezer zip lock bag) or small glass jar with a desiccant*. Place saved seed in a cool, dark and dry place or your freezer. If properly stored the seed will last 4 to 6 years.

Saving tomato seed is easily accomplished and low tech. Plus, the saved seed will last for many years. The following year try other varieties as the current years seed will be viable for up to six years!! This will be your one-of-a-kind tomato seed collection.

Papa

  • *Desiccant – is a substance that removes humidity/moisture.

silica gel

Seed Saving Garden? Basics for the Beginner! Part 4

As heirloom vegetables, herbs and flowers are losing ground by an estimated 10,000 a year, seed saving has become a race for time and the home gardener has a place in this race.

I met a man in the Baker Creek Heirloom Seed store who lost his personal family heirloom seed in a house fire. He was saddened he could not replace those beloved seeds. All the more reason to embrace the heirlooms we can grow and make them our own.

The beginning seed saver will have great success when saving seed harvested from vegetables where seeds mature and dry on the plant. The distance required between varieties is ten (10) feet therefore the possibility for cross pollination is very slight.

Beans (green, dry/fresh shell out beans, lima beans, long beans, soybeans, tepary beans, Asian winged beans, runner beans, fava beans), cowpeas/southern peas (Crowder, black-eyed, purple hull, field peas) and peas (garden, snow and sugar snap peas) are the simplest seeds to save!!

  • Beans require 10 – 20 feet spacing between varieties to prevent cross pollination as they are self pollinating. 10 plants are needed for sufficient seed quantities and seed diversity (color, texture, flavor and acclimated to your garden). You have now grown seed for your particular growing needs. No one else will have this unique seed. Harvest when the pods are dry on the plant, shell/thresh the pods and save the seeds. Seeds may be saved in paper envelopes, placed in a zip lock bag with a desiccant and placed in a lidded glass jar in the freezer. Remember to write the name of the seed and date on the envelope. If harvested and dried correctly the seed will be viable 3 to 4 years.
  • beans-dry-bush-closeupBeans pods2Dried beans on vine
    • Cowpeas require 10 – 20 feet spacing between varieties to prevent cross pollination as they are self pollinating. Ten (10) plants are needed for sufficient seed and seed diversity (color, texture, flavor and acclimated to your garden). You will posses seed unique to your area and it is one- of- a- kind. No one else can claim your seed as theirs. Harvest when pods have dried on the plant, shell/thresh the pods and save the dried seeds. Make sure the seeds are completely dried (should feel like pebbles/rock) and placed in a paper envelope with the name of the seed and date stored. Place the envelope in a zip lock bag with a desiccant and seal in a lidded glass jar. Store the jar in a freezer until the seed is needed. If harvested and dried correctly the seed will be viable for 3 to 4 years.

Cowpeascowpeas2Cowpeas1

  • Peas require 10 – 20 feet spacing between varieties to prevent cross pollination as peas are self pollinating.  Ten (10) plants are needed for sufficient seed quantities and seed diversity (color, texture, flavor and acclimated to your garden). Your saved seed is now unique to your garden and region. No one else will have this one-of-a-kind seed. Harvest when the pods have dried on the plant, shell/thresh the pods and save the dried seeds. Make sure the seeds are completely dried (like pebbles or stone) and place in a paper envelope with the seed name and date of storage. Place the envelope in a zip lock bag with a desiccant and seal in a lidded glass jar. Store the glass jar in the freezer until the seed is needed. If the seed has been harvested and dried correctly the seed will be viable for 3 to 4 years.

Dried peas on vineDried peas1Dried peasRemember only harvest dried seed pods from disease-free plants. Dried seed from diseased plants will infect healthy seed and may cause crop failure in future gardening projects.

Tomatoes need a special process prior to drying. Stay tuned to learn the how-to’s.

Papa

Seed Saving Garden? Basics for the Beginner! Part 3

Why Use Isolation Techniques for Saving Seed?

  • Goal – produce true to type seeds
    • Prevent unwanted cross pollination by isolation
      • Seeds are collected from a number of plants of the same variety, protecting the variety’s genetic diversity (prevents the loss of a variety’s unique characteristics – i.e. form, color and taste)
      • Seeds collected from a number of plants of the same variety, is essential to the health and performance of the variety.
      • Seeds collected in your garden are unique to the changing conditions of your area.
      • These seeds are now a one of kind variety for your special use.
  • Isolation – the use of spatial distance or physical barriers to prevent pollination by wind, vibration, insects or mechanical means.
  • Isolation techniques:
    • Blossom bagging – netting material that is a physical barrier to insects that are drawn to the flowers of vegetables, herbs and flowers that you intend for seed saving.
      • Blossom bags are used around individual (okra) or clusters (tomatoes) of flowers.
      • Blossom bags (made of very fine screening) may be purchased through online horticultural supply distributors and high end garden centers.
      • Save okra seed
    • Caging – a physical barrier made of a frame and screen/row cover to prevent cross pollination of insect pollinated plants.
      • Self pollinated vegetables suitable for caging include eggplant, pepper and tomato.
      • Floating Row Cover material/very fine screening may be purchased online from horticultural suppliers or high end garden centers.
      •  seed saving cages 3wholeIsolation chamber
      • Bagging and caging are useful for those who have limited space and/or cannot meet distance requirements.
        • The netting or row cover material will prevent inadvertent cross pollination by wind or vibration.

Here are two excellent publications for more in-depth information regarding seed saving!

The Complete Guide      the-seed-garden

Please contact me for any question or observation you have regarding seed saving!

Papa

Seed Saving Garden? Basics for the Beginner! Part 2

Start with an easy crop. Consider annual crops that mature in one season.

  • Annuals are plants that grow, mature, set seed and die within one year.
    • Will your seed saving choice have time to mature?
      • Some crops are seed harvested at maturity (when they are ready for the table).
        • Examples are tomato, winter squash/pumpkin and grains.
      • Some crops need additional time for seed maturity.
        • Eggplant, cucumber, snap peas and beans are examples.
        • Leaf crops (oriental greens, lettuce and spinach) and root crops (potatoes and sweet potatoes)
    • Examples of easy, annual self pollinating vegetables are:
      • Garden beans, Southern peas/cowpeas and garden peas (peas, snap peas and snow peas)
        • These varieties are open pollinated. The flowers are self pollinated.
    • As a beginning seed saver, you need to focus on one annual crop for saving seed. Make this one of your favorite vegetables you enjoy at your family table and share with your gardening friends! This should be something fun to accomplish.
    • buttercup        annual veggies
  • Biennial plants complete their life cycle over two growing seasons. Cabbage, kale, Brussels sprouts, beets, cauliflower, broccoli, carrots, turnips and celery are biennials. These crops are usually harvested in their first season of vegetative growth; the flowers are never seen. The second growing season they form flowers and produce seeds; then, the mother plant dies.
    • These crops need a chilling period before flowering. Winter chilling is critical for flower initiation. This process is called vernalization.
    • Overwintering initiates flowering the following spring, producing seed.
  • This type of seed saving is for the advanced seed saver.
  • carrots colored        purple broccoli

These two publications have been helpful to me and I’m sure they will help you as well!

The Complete Guide        the-seed-garden

The terms isolation and population will be my next discussion. Stay tuned!

Papa

Question and Observation About Saving Seed.

Nathan writes, “Why do you need to put bags on your veggies if you want to get their seeds?”

Great question!

  • First and foremost, blossom bagging is an excellent way to prevent pollinating insects from cross pollinating varieties from which you want to save seed.
    • The netting material is a physical barrier to insects that are drawn to the flowers of vegetables that you intend for seed saving.
    • This method is preferred where one has limited space and resources.
    • Air and moisture is allowed to pass through the netting to maintain a healthy environment for the subsequent fruit to be used for saving seed.
    • Online horticultural supply distributors and high end garden centers will be your resource for the net bags.
    • Reba writes, “I’m growing 5 varieties of heirloom tomatoes in my garden this year. I was planning to save the seed but now realize I have a bit more prep to do in order to make that possible. If I saved it now there would be cross pollination between all the varieties. Thank you for making this more clear. Next year I’ll be ready!”
  • There are two (2) types of flowers for tomatoes. It is important to know the distinction between the two.
  • Inserted stigma: the female part of the flower is encased inside the anther cone in the center of the flower.
    • inserted stigma You will notice in this picture a small hole in the tapered tube (corolla tube) in the center of the flower. The stigma (the female receptive part of the flower) is inside that small hole. The stigma is protected in the corolla tube which makes it unlikely that the flower will be cross pollinated.
    • Most tomato varieties have this blossom structure.
    • Blossom bag around the blossom cluster if garden is small and isolation distances cannot be met. (10 – 20 feet is the required isolation distance between tomato varieties)
    • Normally, 10 plants are sufficient to save adequate amounts of seed. However, you may only have space for a few of each variety you choose to save.
      • Under the above circumstances you will have to blossom bag all the blossom clusters to garner adequate seed supplies.
    • Blossom Bags may be purchase online or at horticultural supplies and high end garden centers.
    • Blossom Bagging of Tomato
  • Exposed stigma: the female part (stigma) of the flower is outside the anther cone in the center of the flower.
    • exposed stigma
    • In this picture you will see the stigma is clearly protruding out of the corolla tube. This type of flower is very susceptible to cross pollination from other tomato varieties.
    • Potato leaf and black/purple varieties of tomatoes have this blossom structure.
    • Caging is the preferred method if the garden is small and isolation distances cannot  be met. The use of floating row cover (similar to dryer sheet material) will absolutely insure there will be no cross pollination from other tomato varieties. The floating row cover will allow for air and moisture to pass  freely to the caged plants. (20 – 50 feet is the required isolation distance between tomato varieties) Ten (10) plants are the requirement for saving seed from your caged tomato plants.
    • Floating Row Cover may be purchased online from horticultural suppliers or high end garden centers.
    • seed saving cages 3whole     seed saving cages 5bce525c5436aa03bad5992585ea16d21-001

And to all a good night!!

Papa