Why Does the Pepper Seed Take So Long to Germinate?

I started my peppers at the same as the tomatoes. Some of the peppers did not come up until 2 weeks later than the tomatoes. Why is this happening?

Pepper seedlings

Pepper-Doux-DEspagne-PP138-web

Pepper-Etiuda-PP192-web

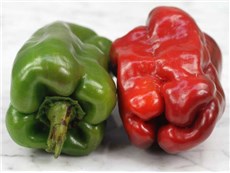
Peppers are related to tomatoes, but have different requirements for germination. Sweet pepper requires a germination temperature of 75° – 80° (F). The seed trays benefit from being covered with plastic domes or plastic wrap to retain humidity until germination. A minimum of 6 hours of sunlight will allow your seedlings to have shorter, stockier stems.

To meet these requirements you will have to supply:

  • Heat source
    • On top of the refrigerator, where the defrosting coils are located.
    • On top of an electric water heater.
    • A wire shelf with an incandescent light fixture placed underneath.
    • A thermostatically controlled electric heat mat placed under the flat.
  • Light source
    • Natural sunlight – 6 hours minimum
    • Artificial light
      • Fluorescent fixture – seed trays 1 inch from the bulbs for 16 hours a day
      • LED fixture – seed trays 1 inch from the bulbs for 14 – 16 hours a day
  • Humidity retention source
  • Soil
    • Soil vs. soilless mix
    • Jiffy planter pellets – peat moss or coconut coir
    • Soil blocks made from compost and other natural amendments (blood meal, bone meal, green sand, rock phosphate, etc.)
  • Water
    • Tap water
    • Well water
    • Filtered water
    • Rain water

Trinidad-Scorpion-Hot-PepperCraigs-Grande-Jalapeno

Golden-Cayenne-web

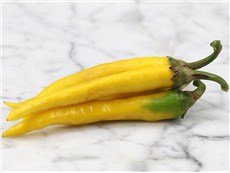
Hot peppers require a germination temperature of 80° – 85° (F). The hotter germination temperature is necessary for tropical pepper types. Some varieties such as Ghost Pepper, Habanero and Trinidad Scorpion (all 3 are Capsicum chinense) require a longer germination time. You need patience to grow these types of hot pepper. You may be able to speed up the germination process by soaking the seed overnight. By re-hydrating the seed, the plants may emerge more quickly!!

The basic requirements for hot pepper are the same as the sweet pepper mentioned above.

Papa

Beets from the Hoop House Two Weeks Early!

Garden beets grown in a hoop house are ready to harvest two weeks before those grown outside. The beet plants and beets are more tender. The protection from the outside elements accelerate the growth for an early crop.

Hoop HouseWP_20150519_19_14_50_Pro

WP_20150519_19_18_07_Pro                     WP_20150518_18_51_58_Pro     WP_20150518_18_52_23_Pro              WP_20150518_20_10_35_Pro

The beauty and flavor of these beets are unbeatable (excuse the pun!)!!

Papa

The Squash Vine Borer is your Enemy and Here’s How to Defeat Them.

You’ve started your summer squash and zucchini. The plants look great! A couple of weeks later, the plants start to wilt and some die. What did I do wrong? After careful observation, you notice there is something that looks like wet sawdust at the base of the plant. Plus, you see small holes in the bottom stem. What is going on?

SVBwilt  SVBdamage

Your enemy is the Squash Vine Borer!! (SVB)

svb

The female Squash Vine Borer moth (Melitta curcurbitae) lay brown eggs especially on the stems, just above the soil line.

squash-vine-borers-3-sm  SVB1SVBmating   SVBeggs2

Eggs hatch in 10 days. Once the eggs hatch, they immediately enter the stem, leaving a small hole at the place of entry surrounded by frass (moist sawdust like debris). The larvae (white caterpillars with brown heads) bore into the stem and remain until maturity before pupation (the transformation of the larvae to a pupa(in a cocoon)). They will now stay in the soil (usually 1″-2″) and over winter .

squash-vine-borers-4    SVBmoth_pupae

Squash Vine Borer moths emerge from the ground from early spring through mid-summer. The moth looks like a wasp and is a half inch long. The wings are clear and look like a windowpane. Unlike other moths, this one flies during the day and makes a buzzing sound.

Now that you have identified the enemy, what are your weapons of warfare?

  • A preemptive strategy would be to use a floating row cover (sheer, light weight fabric that is placed over a crop to protect from insects). It is secured in place to prevent insects from damaging the crop. The row cover is put on at the time of planting until the plants begin to flower. Squash crops require insect pollination.
  • Monitor by using a yellow colored bucket trap with water, placed near the newly planted squash plants. The yellow color attracts the moths.  Traps must be checked daily. Once you’ve found moths in the traps, start looking for stem damage. This indicates the female moth is out laying eggs.
    • SVBtrap
  • Create a barrier on the lower stem by using materials such as aluminum foil. Wrap the foil around the lower stem to confuse and prevent the moth from  laying eggs.
  • Plant a trap crop of early planted Hubbard squash three (3) weeks prior to planting your preferred squash crop.
  • Use succession planting (weather permitting). Have fresh transplants ready to go. A late crop planted after SVB pressure may offer a harvest. Do not plant your late crop where there has been previous pressure from the SVB. Rotate your planting to an unaffected area.
  • SVB resistant varieties of squash, such as Waltham Butternut, offer a solid stemmed variety to thwart the penetration of the larvae. Cucurbita moschata are their least favorite, as they are solid stemmed. Cucurbita pepo are their most favorite, as they are hollow stemmed. Seed catalogs will list this information for each squash seed offered.
  • When a squash plant has been attacked by the squash vine borer, find the borer by looking for the frass or small holes with frass. Carefully slit open the stem and remove the caterpillar. Cover the wound with fresh soil or compost to encourage the re-rooting of the plant.
  • Remove and destroy any plants that are severely wilted or dead immediately. Do not compost these plants!!
  • Sanitation is key! Immediately remove your squash vines after harvest. Do not compost!! Burn the vines or bag the vines and remove them from your property. The soil must be exposed to reveal the cocoons.
  • Till or fluff the soil up to 2″ to expose SVB cocoons. Songbirds and poultry delight in eating the pupae (cocoons).
  • Always rotate your squash crop to another space each year.

My strategy this year includes the Blue Hubbard trap crop and yellow trap buckets. Plus, I will preemptively spray the ground stems with a mixture of vegetable oil and Dipel (Bacillus thuringiensis). I’ll keep you updated throughout the summer.

Papa

Got Squash Bugs? Use Trap Crops!

Ugh, here we go again. Those nasty squash bugs are back! I really wanted to grow zucchini and yellow crookneck. Why waste my time! I hear this over and over again.

Now, there is a solution. Trap Crops!

  • Plants that are planted next to a squash crop to attract pests as either a food source (pollen/nectar) or an egg/larval site.
  • Attract pests to the border areas, where they can be killed. Pests on the unsprayed crop will be reduced.
  • Exploiting the squash bugs special appetite.
  • Intercepting the pest from the edges.
  • Check trap crop three (3) times per week.

Plant Red Kuri squash, Blue Hubbard Squash and Buttercup squash (as a trap crop) three (3) weeks prior to planting summer squash, winter squash, cucumber, cantaloupe and watermelon. The trap crop should be seeded in pots for transplanting, prior to direct seeding squash, cucumber and melons. Monitor for squash bugs to determine if treatment is needed on the trap crop.

Plant Red Kuri or Blue Hubbard or Buttercup squash transplants either surrounding, adjacent, at the four corners or in containers next to the crop.

red kuri blue hubbard

buttercupTrap Crop illustration

Monitor for squash bugs.

squash bug eggs nymphsquash bug nymph

Squash bug adult

Spot spray the squash bugs on the trap crop with a*pyrethrin insecticide. It may be necessary to spray the entire trap crop when the population threshold is exceeded. In other words, the squash bugs have infested the entire trap crop with eggs, larvae and adults.

*Pyrethrin insecticides – Evergreen Pyrethrum Concentrate, *OMRI Listed

PyGanic® Crop Protection EC 5.0 II, *OMRI Listed

* OMRI Listed: The Organic Materials Review Institute (OMRI) is a national nonprofit organization that determines which input products are allowed for use in organic production and processing. OMRI Listed—or approved—products may be used on operations that are certified organic under the USDA National Organic Program.

Caution – You must read the label!! The label is the law!! Pyrethrins will instantly kill any insect that is sprayed. That includes beneficial insects (honey bees, bumble bees, lady bugs, parasitic wasps, etc.). Be very careful!! Remember, squash crops, cucumbers, and melons are dependent upon pollinators to produce fruit.

When you follow these steps you will enjoy a fruitful harvest. Let me know of your success!

Papa

You may purchase the above varieties of squash at Baker Creek Heirloom Seed Company by clicking on the links below.

http://www.rareseeds.com/red-kuri-squa-hokkaido-/

http://www.rareseeds.com/blue-hubbard-squash/

http://www.rareseeds.com/buttercup-squ/

Decisions, Decisions Buying Packs of Seed!

You’re poring over your seed catalog, looking at seed online or better yet choosing your seed in the seed store. Hopefully, you’ve narrowed your choices. Making a list is a wise way to finally make your decision.

Let’s see what the seed packet says. The description should entice you to consider your options.

  • Title of pack – the variety and color
  • Catalog number, Lot number, amount of seed, cost, sell by date
  • Days to maturity –
    • Direct sowing of  seeds- days from the time you sow the seeds to the time of harvest. i.e. – beets, carrots, beans, peas, kale, lettuce, borage, dill, zinnia, sunflower
    • Transplants from germinated seed – days from time of transplanting into garden to the time of harvest. i.e. – cabbage, broccoli, cauliflower, brussels sprouts, tomato, pepper, eggplant, basil, thyme, petunia, snapdragon
  • A more detailed description of variety – color, height/length, weight, health benefit and overall appeal.
  • Detailed planting instructions – seasons for sowing, planting depth, seedling care, possible succession planting (timed, multiple sowing), soil requirements, temperature requirements, moisture requirements.
  • Seed company – pertinent company information

Happy Planting!!!!!

WP_20150428_18_47_24_ProWP_20150428_18_47_36_Pro

Transplant Progress of Coyne and Hannah Tomatoes

The Coyne and Hannah German Heirloom tomatoes were started on April 4th. It is amazing to see the progress from seed into seed flats, then transplanted into cell flats. They are continuing to grow in the cold frames. Plus, the cooler growing temperatures and fresh air is making the transplants more sturdy. Hopefully, the transplants will be short and stocky when it comes time to plant directly in the garden.

Below you will see the original seed flats and then the transplanted cell flats. Quite a transformation!


WP_20150423_18_46_47_ProWP_20150423_18_46_28_ProWP_20150423_18_52_59_Pro      WP_20150423_18_52_07_Pro