Got Milkweed? You’ll get Monarchs!!

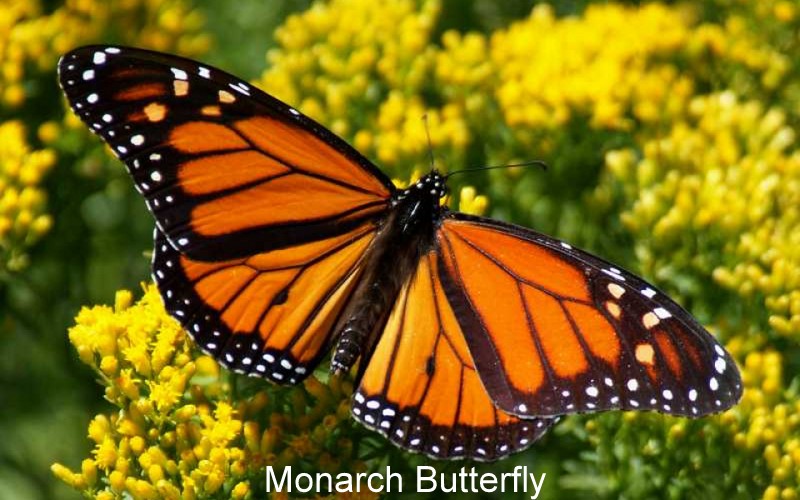
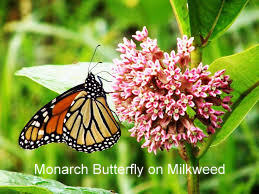
Kathy, a friend at work, dug up three native plants of Milkweed (Asclepias purpurascens) from her farm. They were given to me to transplant on my property. The Purple Milkweed will be used to attract the Monarch butterfly. The plant itself is the larval food for the Monarch. WP_20150601_19_31_48_Pro         WP_20150601_19_32_00_Pro

WP_20150601_19_32_34_Pro

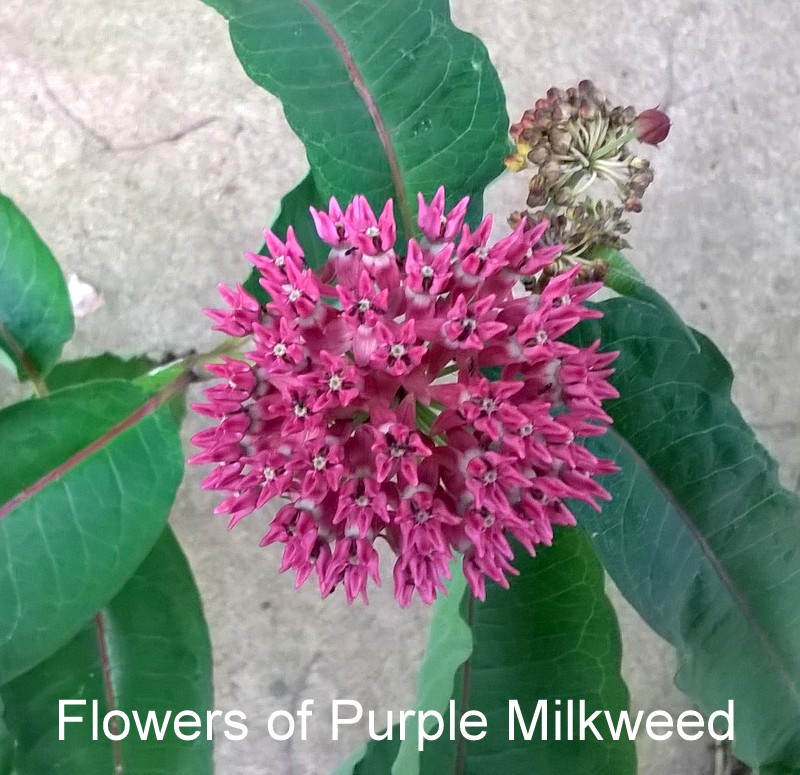
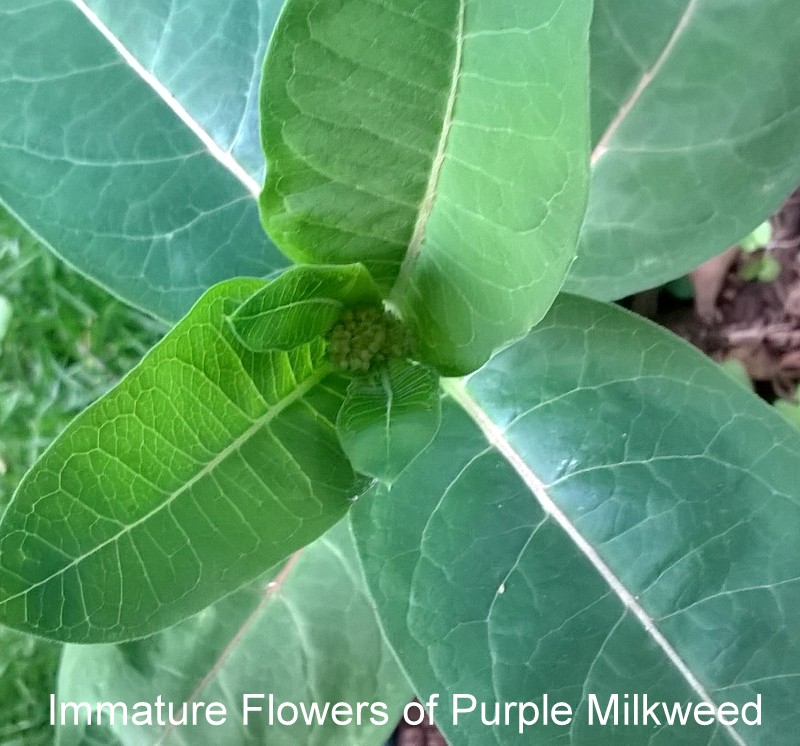
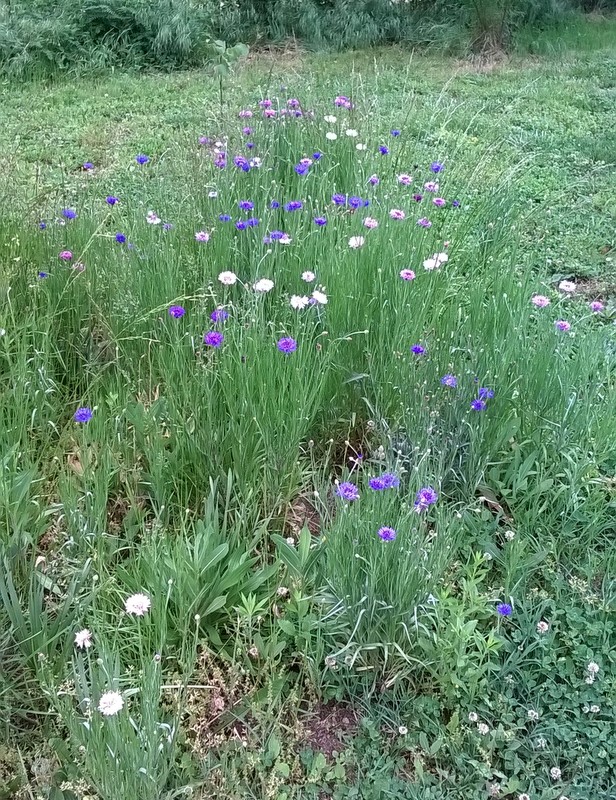
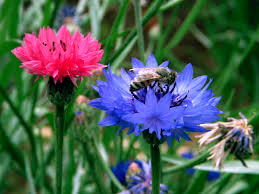
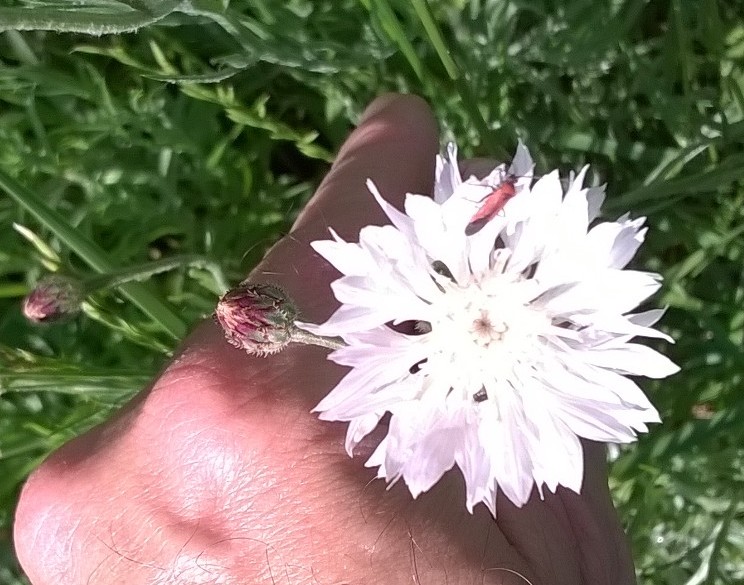
These hardy perennials flower from late May through July. The flowers are adored by many different species of butterflies and moths. I have observed butterflies waiting their turn to enjoy the nectar from these unusual flowers. Monarch numbers are decreasing which makes the planting of milkweed essential. Monarch populations have decreased by 90%. All the more reason to plant milkweed on your property!! Indiscriminate use of herbicide and mowing of roadsides has eliminated much needed plantings of milkweed. A 3′ x 3′ planting of milkweed will go a long way to help the beautiful Monarch butterfly.

Monarch larvae          monarch-butterfly-wallpaper---1920x1200

Monarch on milkweed

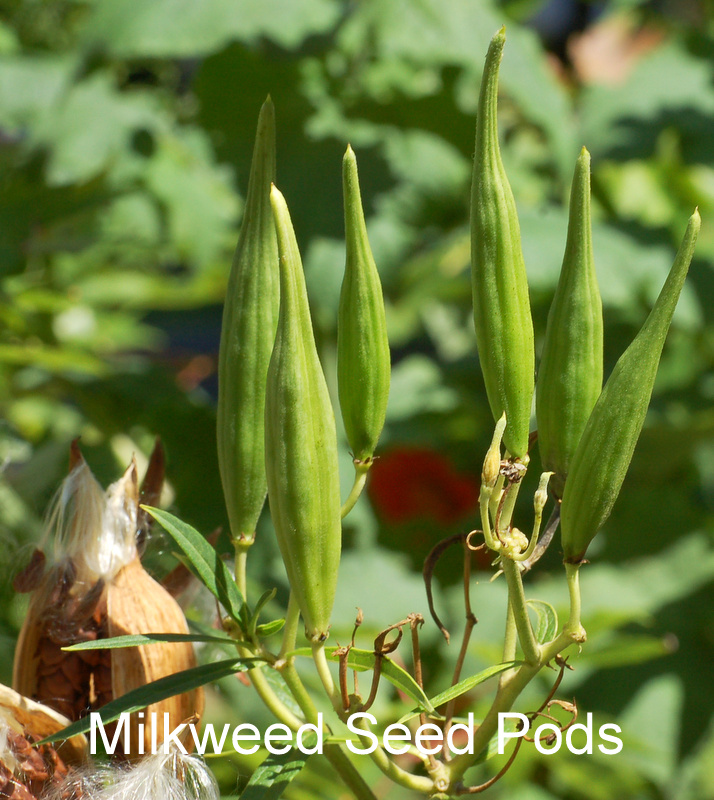
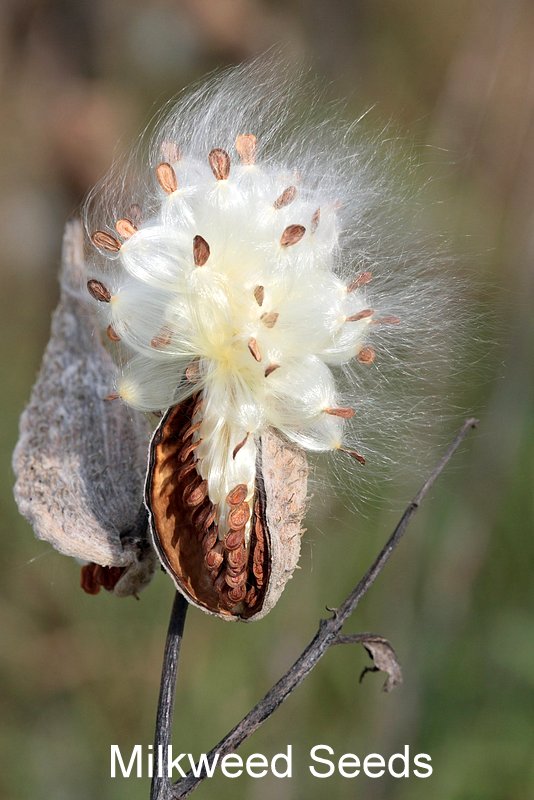
It is wise to collect seeds from your milkweed plants instead of digging them up. Existing plants are established and should be allowed to produce more seed to be released. Nothing could be easier! After the flowers are pollinated, wait for the seed pods to mature and start to open. Cut off a few of the seed pods and place in a paper bag. The seed will fall to the bottom of the bag. Collect the seed and place in a dated, labeled envelope.

Swamp_Milkweed_Asclepias_incarnata_Pods              Swamp_Milkweed_Asclepias_incarnata_'Ice_Ballet'_Open_Pods

Milkweed-in-seed2

Let’s do all we can to insure the protection of the milkweed plant for the survival of the Monarch butterfly!!

To purchase milkweed seed, please check out these links:

http://www.rareseeds.com/milkweed-butterfly-weed/

http://www.rareseeds.com/milkweed-mexican-whorled/

http://www.rareseeds.com/milkweed-red-or-swamp/

Papa

Why Does the Pepper Seed Take So Long to Germinate?

I started my peppers at the same as the tomatoes. Some of the peppers did not come up until 2 weeks later than the tomatoes. Why is this happening?

Pepper seedlings

Pepper-Doux-DEspagne-PP138-web

Pepper-Etiuda-PP192-web

Peppers are related to tomatoes, but have different requirements for germination. Sweet pepper requires a germination temperature of 75° – 80° (F). The seed trays benefit from being covered with plastic domes or plastic wrap to retain humidity until germination. A minimum of 6 hours of sunlight will allow your seedlings to have shorter, stockier stems.

To meet these requirements you will have to supply:

  • Heat source
    • On top of the refrigerator, where the defrosting coils are located.
    • On top of an electric water heater.
    • A wire shelf with an incandescent light fixture placed underneath.
    • A thermostatically controlled electric heat mat placed under the flat.
  • Light source
    • Natural sunlight – 6 hours minimum
    • Artificial light
      • Fluorescent fixture – seed trays 1 inch from the bulbs for 16 hours a day
      • LED fixture – seed trays 1 inch from the bulbs for 14 – 16 hours a day
  • Humidity retention source
  • Soil
    • Soil vs. soilless mix
    • Jiffy planter pellets – peat moss or coconut coir
    • Soil blocks made from compost and other natural amendments (blood meal, bone meal, green sand, rock phosphate, etc.)
  • Water
    • Tap water
    • Well water
    • Filtered water
    • Rain water

Trinidad-Scorpion-Hot-PepperCraigs-Grande-Jalapeno

Golden-Cayenne-web

Hot peppers require a germination temperature of 80° – 85° (F). The hotter germination temperature is necessary for tropical pepper types. Some varieties such as Ghost Pepper, Habanero and Trinidad Scorpion (all 3 are Capsicum chinense) require a longer germination time. You need patience to grow these types of hot pepper. You may be able to speed up the germination process by soaking the seed overnight. By re-hydrating the seed, the plants may emerge more quickly!!

The basic requirements for hot pepper are the same as the sweet pepper mentioned above.

Papa

We Got Skunked! A Rather Smelly Experience!!

Ah, the joys of living in the country! Tuesday (May 26), we had a smelly experience. We had to deal with a skunk. It sprayed (phew!) an area on the south side of our house. No one got directly sprayed, but the fumes permeated parts of the inside of our house.

skunk

There is a lot of clean up involved. Clothing, bedding and towels have to be washed. Walls have to be deodorized. Plus, trips to the store for added supplies. It is quite an undertaking.

Papa

Questions About Biological Worm Spray (Bacillus thuringiensis var. kurstaki)

I get many questions regarding the use of biological caterpillar (worm) spray. There are many misconceptions about how this valuable tool is used. Let’s clear the air! Bacillus thuringiensis var. kurstaki or Bt was discovered back in 1901. The name of the bacteria was given in 1911. I’ll not bore you with the rest of the history.

Suffice it to say, due to the use of synthetic pesticides, many were concerned about the toxicity and environmental issues. Fast forward to the 1980s. Bt became essential as an alternative to toxic pesticides. The effectiveness of Bt is remarkable to say the least. The bacteria with its crystalline toxins attack the gut of caterpillars and destroy the creature from within. When used on a frequent basis, it is almost 100% effective. It is totally safe for humans, pets, birds, fish, pollinators and beneficial insects. Bt may be sprayed up until the time of harvest!! Bt is no longer viable or effective after continued exposure to ultra-violet light and water.

The greatest misconception involves the insertion of the Bt genetic material into the seed germ. The Bt GMO* ready corn or potatoes has Bt as an internal mechanism to kill caterpillars. The agri-business companies use other genetic materials (from other bacteria and viruses) to potentiate the Bt gene. This really is scary stuff!!!

The externally sprayed Bt material is completely safe. It is not systemically part of the plant. Whereas, a Bt GMO* ready crop has the insecticide in all parts of the plant. This GMO creation was made for convenience and to save money. No one can say for sure what are the long term effects!!!

I started using Bt in 1978. Up until that time, my broccoli plants were full of caterpillars. I remember being served some broccoli, only to find dead worms on my plate. Ugh, nasty! Once I used Bt, there were no more worms!!! It really does work!! Plus, it is very cost effective and safe to the environment.

*GMO – Genetically Modified Organism – “A GMO is a plant or animal that has been genetically modified through the addition of a small amount of genetic material from other organisms through molecular techniques. Currently, the GMOs on the market today have been given genetic traits to provide protection from pests, tolerance to pesticides, or improve its quality. Examples of GMO field crops include Bt-potatoes, Bt-corn, Bt-sweet corn, Roundup Ready soybeans, Roundup Ready Corn, and Liberty Link corn.” University of Kentucky Entomology

Papa

Beets from the Hoop House Two Weeks Early!

Garden beets grown in a hoop house are ready to harvest two weeks before those grown outside. The beet plants and beets are more tender. The protection from the outside elements accelerate the growth for an early crop.

Hoop HouseWP_20150519_19_14_50_Pro

WP_20150519_19_18_07_Pro                     WP_20150518_18_51_58_Pro     WP_20150518_18_52_23_Pro              WP_20150518_20_10_35_Pro

The beauty and flavor of these beets are unbeatable (excuse the pun!)!!

Papa

There are White Spots on my Peas! Uh Oh, it’s Powdery Mildew!

The daytime temperatures are getting warm and it’s cool at night. It seems like the perfect scenario for great growing weather. Your peas are up and growing like a storm. What’s that on the leaves and pods? There are white fuzzy spots growing on my peas. Powdery Mildew strikes again!!

peapm

Powdery mildew is the most common occurring plant fungal disease. Its appearance, when first noticed, is characterized by spots or patches of white to grayish powdery growth on the upper surface of leaves and their stems.

  • It impairs photosynthesis
  • Stunts growth
  • Increases the rate of plant decline

Advanced stage of powdery mildew:

  • Foliage turns to yellow, leaves curl or turn brown.

D-TO-LTAU-FO.001h        D-SP-EPOL-FR.001h

How does this happen? There are three requirements for disease to flourish. A host, the pathogen/disease and the right environmental conditions.

  • Powdery mildew (thin layers of fungal tissue on the surface of the leaf which produce spores) requires new and young living plant tissue to grow.
    • The disease grows as mycelium (fungal tissue) on the surface of the affected plant as white patches where the spores are produced.
      • Spores make up the white/gray powdery growth visible on the leaf surface.
      • Spores  of powdery mildew are carried by the wind, splashing rain drops and/or insects to new plant tissue.
      • The spores can produce in 48 hours.
  • Warm, humid days and cool nights are the perfect conditions for the fungus to grow.
    • Moderate temperatures of 60° to 80° (F) are favorable temperatures for powdery mildew growth.
    • Temperatures of 90° (F) and above inhibits the growth of the disease.
  • High humidity for spore germination common in crowded plantings, where air circulation is poor and damp shaded areas invite this plant fungal disease.
  • Crop debris and host weeds are important to the survival of powdery mildew.
  • The spores of powdery mildew over winter attached to plant parts and plant debris.

These are the common preemptive strategies to avoid/combat powdery mildew.

  • Plant powdery mildew resistant varieties if available.
  • Plant in full sun.
  • Properly space plantings to allow good air circulation.
    • If plants are overcrowded, prune to allow increased air circulation, reduce humidity and cross infection.
  • Arrange your rows or beds east to west to eliminate shade possibility.
  • Tallest plantings should be to the north.
  • Avoid overhead watering. Best time to water is mid morning allowing the plants to completely dry.
  • Stay out of the garden when wet!!! Otherwise, you become a carrier of the disease.
  • Avoid the late summer application of nitrogen fertilizer (fish emulsion, composted poultry litter, ammonia nitrate, urea) which limits new growth the disease attacks.
  • Remove ALL diseased plant parts and burn or bag and remove from property.
    • If possible, remove diseased plant parts on a sunny, hot, wind free day.
      • Spores are killed by heat and direct sunlight.
      • In the absence of wind there is less of a chance for spore dispersal.
  • Remove ALL plant material and plant debris (mulch included) in the fall.
    • Survival rate of any overwintering fungal spores is decreased.
  • DO NOT COMPOST ANY PLANT MATERIAL OR DEBRIS where this disease was active.

When fungus pressure/threshold is too great you can pull all diseased plants or are there fungicides to use? The answer is YES!!

  • Horticultural oils – Saf-T-Side Spray Oil®, Sunspray Ultra Fine Spray Oil® – follow label directions
  • Plant Based Neem Oil (Amazon Link), Plant Based Jojoba Oil (Amazon Link) – follow label directions
    • Never apply when temperatures are 90° (F) or above or with drought stressed plants.
    • Never apply an oil spray within two (2) weeks of a sulfur application as plants may be damaged.
  • Wettable Sulfur is most effective when applied before disease symptoms appear. – Safer Garden Fungicide® (Amazon Link) – follow label directions
    • Never apply when temperatures are 90° (F) or above or with drought stressed plants.
    • Never apply within two (2) weeks of an oil spray.
    • Be careful when spraying squash and melons as there may be damage.
  •  Sodium Bicarbonate (Amazon Link)
    • Combine with horticultural/dormant oil with liquid/insecticidal soap
      • 1 TBS Baking Soda, 1 tsp horticultural/dormant oil, 1 tsp insecticidal/liquid soap to 1 gallon of water.
      • Spray every one to two weeks.
      • Use sparingly to avoid sweetening (alkaline) the soil.
  • Potassium Bicarbonate – Kaligreen® – contact fungicide killing spores of powdery mildew quickly.
    • Approved for organic use. Follow label directions.
  • Mouthwash – generic ethanol based – spray 1 part mouthwash to 3 parts water.
    • Caution use on new foliage as it may be damaged.
  • Vinegar – spray 2 -3 TBS apple cider vinegar (5% acetic acid) mixed with 1 gallon water.
    • Caution use on new foliage as it may be damaged.
  • Milk – natural occurring compounds in milk attack the disease while improving the plants immune system.
    • Spray 1 part milk to 2 parts water weekly.

Biological Fungicides – beneficial microorganisms when sprayed on plant tissue destroy fungal disease. Serenade®, Actinovate SP® (Amazon Link), Cease®

  • Active ingredient  – Bacillus subtillis – prevents powdery mildew from infecting the plant. Follow label directions.
    • Non toxic to people, pets and beneficial insects
      • Not proven to be as effective as oils or sulfur

Here are a few examples of powdery mildew.

powdery_mildew_tomatoes      carrot-powdery-mildew-1L

9-4PM-on-grape-leaves-1ANNEMIEK (1)       PMSquashBHedlundHerndonVA2006-1y47tkc

PM watermelon

Remember, fall clean-up is essential!! Be on your guard!

Papa

Cheerful, Self Sowing Bachelor’s Buttons

I planted several different varieties of Bachelor’s Buttons last year. The seed heads shattered and self sowed a naturalized planting for this spring and summer. I love the colorful display and the added benefit of sustaining beneficial insects. Try growing Bachelor’s Buttons and you won’t be disappointed!!

WP_20150516_12_40_48_Pro WP_20150516_12_41_03_Pro WP_20150516_12_41_15_ProBachelor button!WP_20150516_16_12_22_Pro

Vegetables are for the body. Flowers are for the soul!!

Papa